Every WordPress site needs an SEO plugin. And when it comes to SEO plugins, Yoast SEO is far and away the most popular option. WordPress SEO is, unavoidably, a complex topic, though. And to address that, Yoast SEO has built in plenty of complex features to give you pinpoint control over your site’s SEO.
As a result, even though the Yoast team has done a great job trying to make SEO beginner-friendly, there’s still a good chance you need some help with how to use Yoast SEO.To give you that help, we’ve written this monster Yoast SEO tutorial.
It’s such a big guide that we’ve split it into two parts:
Ready to learn how to use Yoast SEO? You can click above to skip straight to the advanced section. Otherwise, let’s start at the beginning!
The Beginner’s Guide To Yoast SEO
In this section, we’ll cover what you need to know if you’re new to Yoast SEO. You’ll learn:
- How to properly enter information in the configuration wizard
- What the Yoast SEO meta box is and how it works
- What you can do from the Yoast SEO dashboard
Then, in the next section, we’ll get into some of the more advanced Yoast SEO settings.
Using The Yoast SEO Configuration Wizard
After installing Yoast SEO, you can access the Yoast SEO dashboard by clicking on the new SEO tab in your WordPress dashboard.
If this is your first time using the plugin, you should see a big notice for First-time SEO configuration.
By clicking the configuration wizard link, Yoast SEO will give you a guided tour to help you set up all of the basic SEO settings:
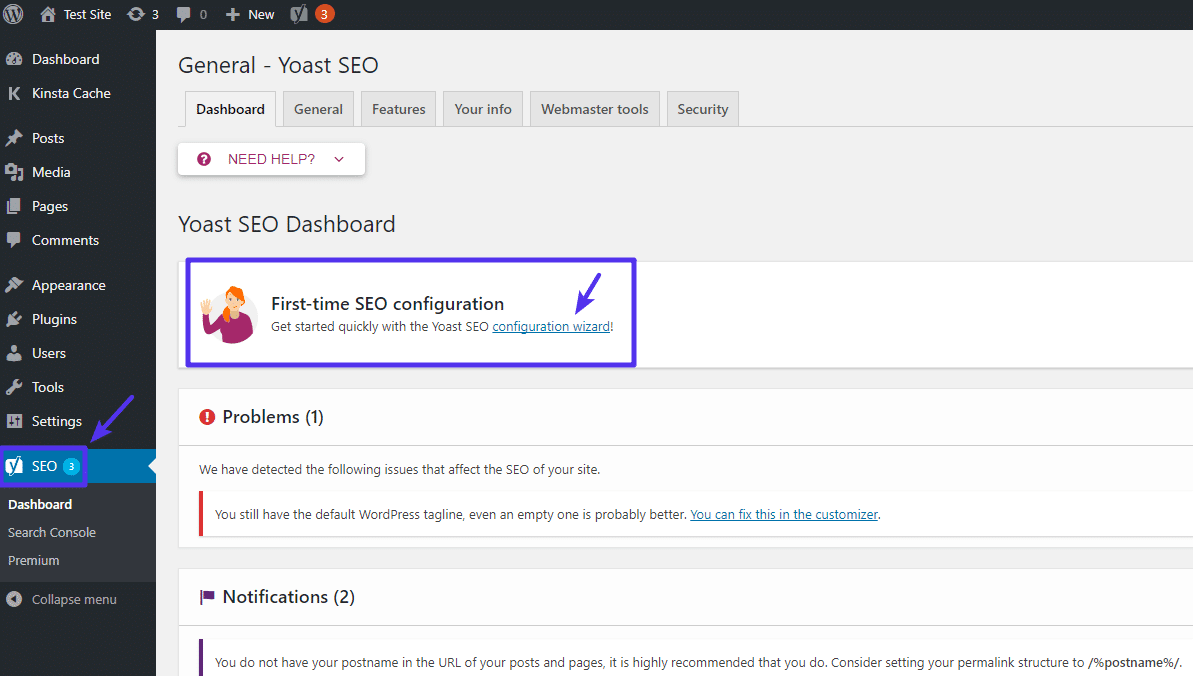
How to access Yoast SEO configuration wizard
Go ahead and click that link. Then, on the first page of the wizard, click Configure Yoast SEO.
Below, we’ll take you through the rest of the sections in the configuration wizard.
Section 2: Environment
In the Environment area, you should always choose Option A unless you’re working on a development site:
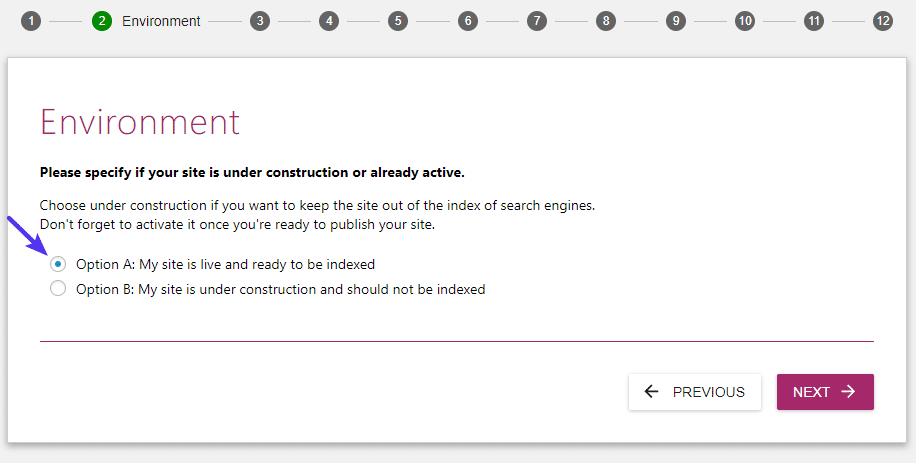
You should usually choose Option A
Section 3: Site type
In the Site type section, try to choose the type of site that best matches your site:
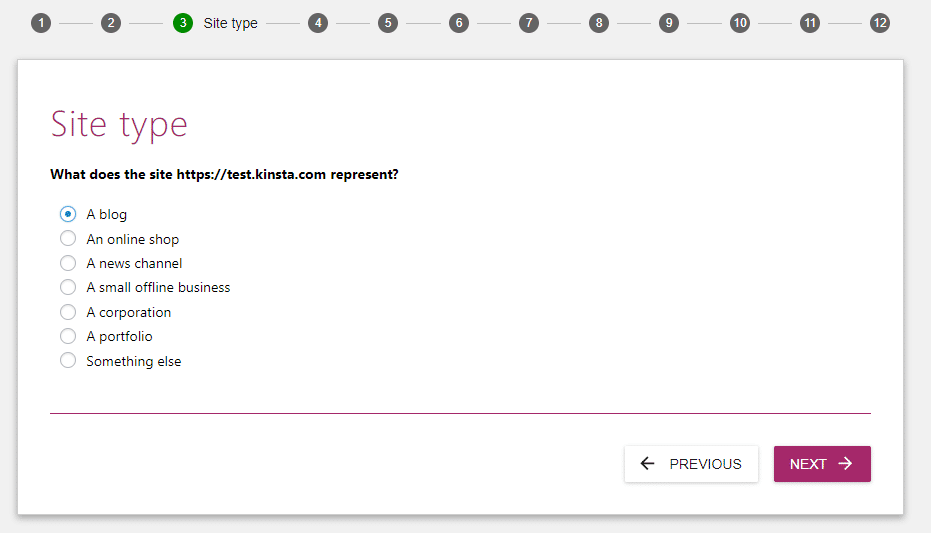
Choose the option that most closely fits your site
Section 4: Company or person
Next, choose whether your website represents a company or a person.
If you choose Company, you’ll be asked to also enter:
- The name of the company
- Your company’s logo
And if you choose Person, you’ll just need to enter the name of the person.
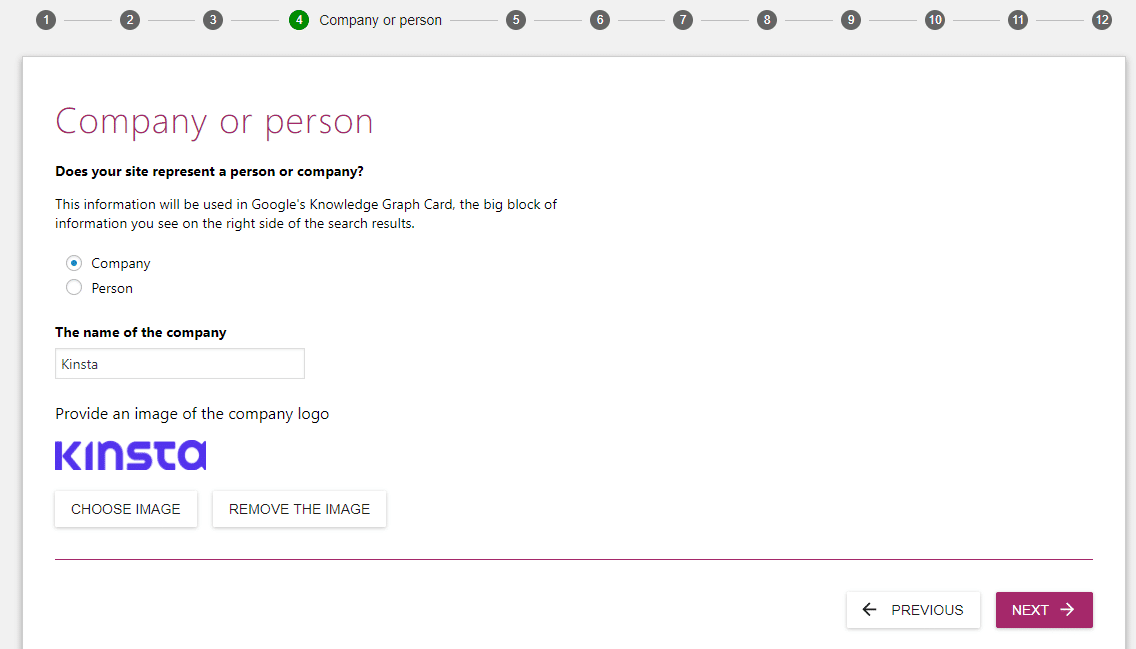
Choose whether your site represents a company or a person
This section helps Yoast SEO provide additional information to Google to generate a Knowledge Graph Card. These cards are pretty eye-catching, so every little bit of information helps:
An Example of a Knowledge Graph card
Section 5: Social Profiles
In the Social profiles section, enter all of the social media profiles for your website. Like the previous information, this helps Yoast SEO provide extra details to Google for the Knowledge Graph.
If you’re creating a website for a company, this will be your company’s social media profiles. If it’s a person, this will be that person’s details.
You don’t need to enter all of them – just choose the social media profiles that you actively want to promote:
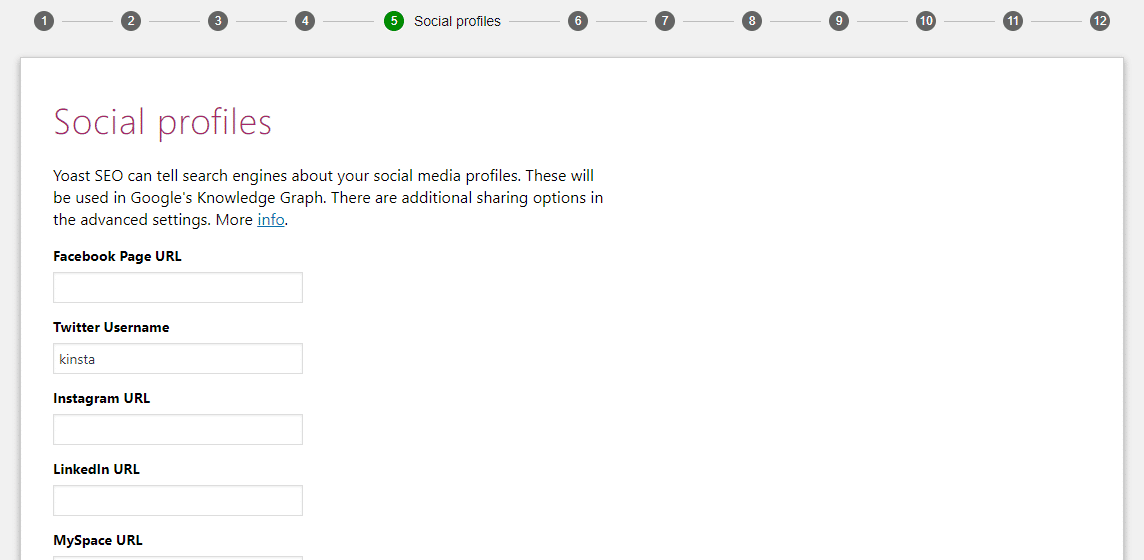
Enter the social profiles that you want to promote
Section 6: Post type visibility
In the Post type visibility section, you can choose whether or not to allow certain types of content to be indexed in search engines.
99.99% of the time, you want to leave these as the defaults. Unless you already know what you’re doing, don’t change anything:
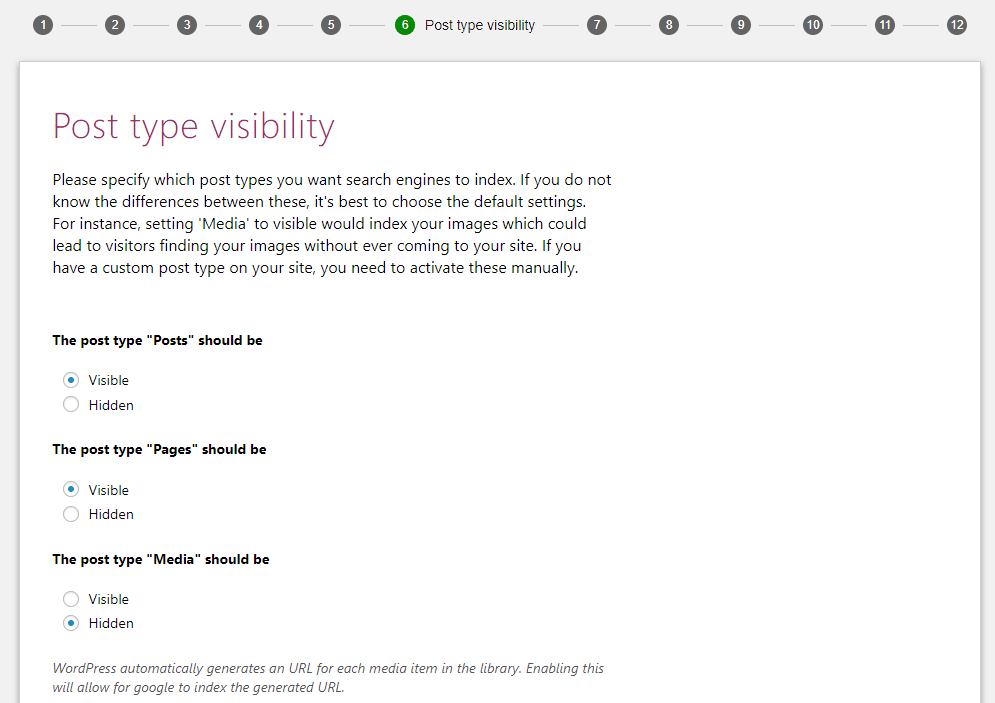
Leave these as the default most of the time
Section 7: Multiple authors
If you’re the only person writing on your site, Yoast SEO will automatically mark your author archives as noindex to avoid duplicate content (noindex tells search engines not to index that page).
Yoast SEO does this because, on a single author blog, the author archives is 100% identical to your actual blog index page.
If you do plan to have multiple authors, choose yes so that people can still find a specific author’s post archives in the Google search results:
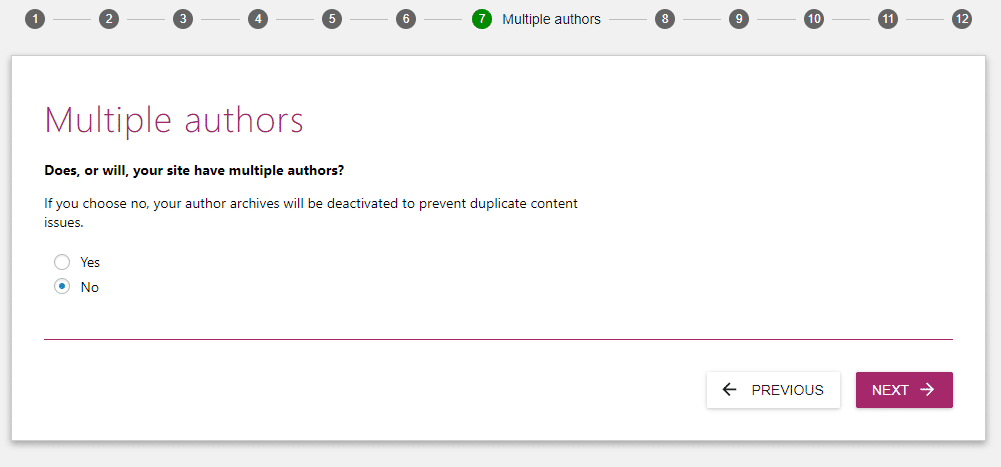
Choose whether you’ll have one or multiple authors
Section 8: Google Search Console
Google Search Console is a tool from Google that allows you to view information about how your site works in Google organic search. If you’re already using Google Search Console, you can allow Yoast SEO to import information by clicking the Get Google Authorization Code and entering the code here.
If you’re not sure what Google Search Console is, feel free to just click Next and skip this for now. While Google Search Console is definitely something you should investigate eventually, it’s not something that’s necessary to the functioning of Yoast SEO:
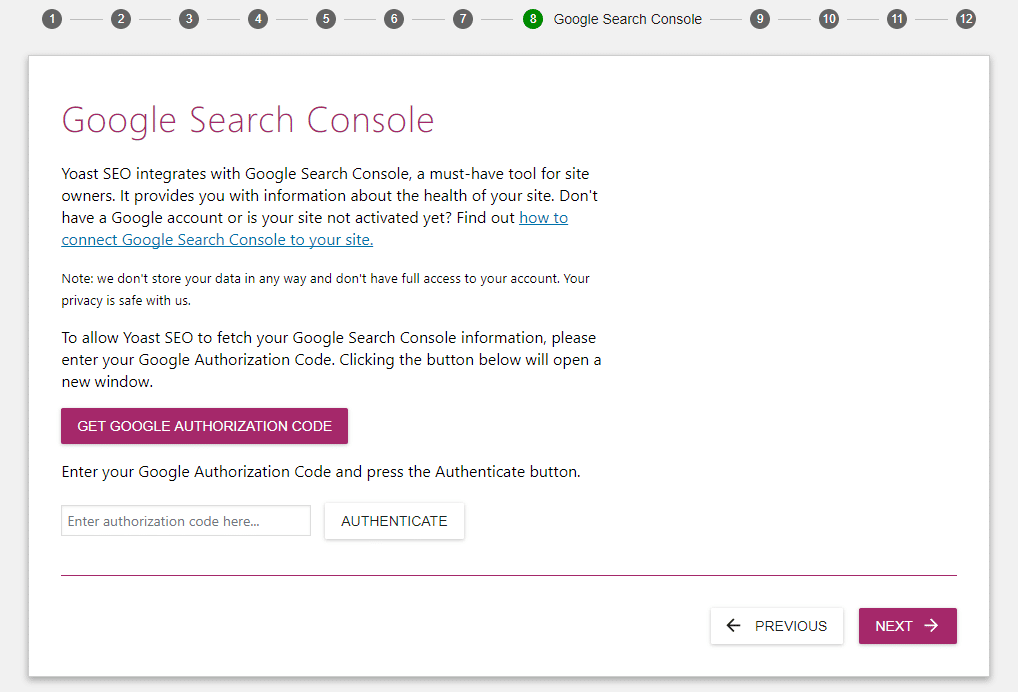
If you have a Google Search Console account, you should sync it now
Section 9: Title settings
Your Title is the main headline that appears in Google search results (and visitors’ browser tabs):

An example of an SEO title
By default, Yoast SEO makes your title:
Post Name *Separator* Website Name
In this section, you can choose:
- Your website name
- The *Separator*
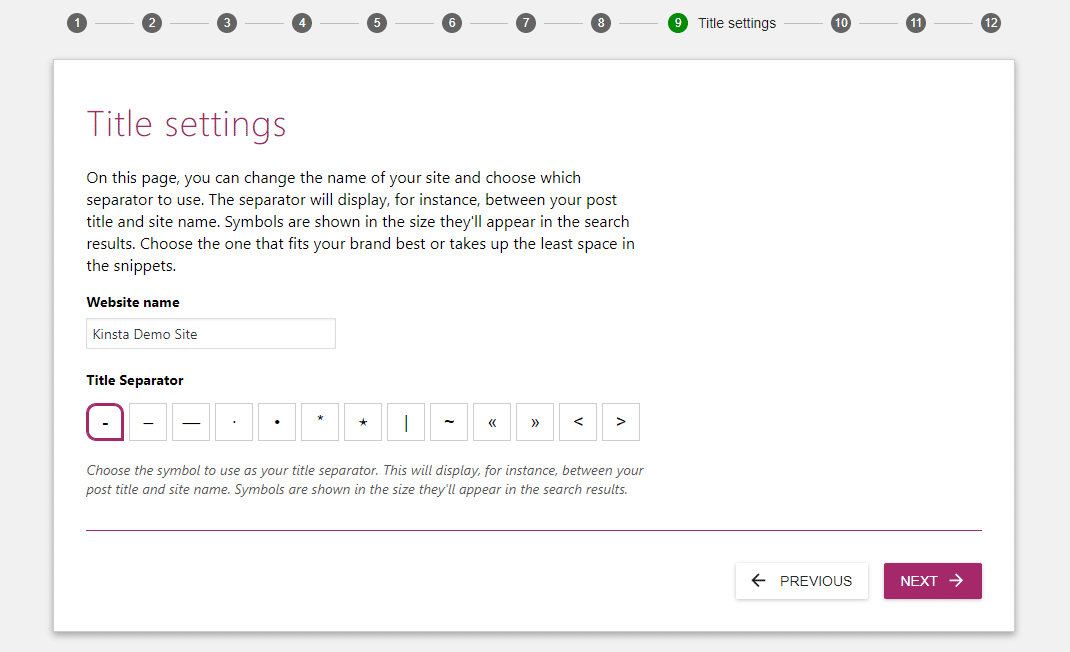
Choose your desired title settings
For example, if you had a post with the title “How To Use Yoast SEO” and the settings above, your site would look like this in Google:
How To Use Yoast SEO - Kinsta Demo Site
Wrapping Up The Configuration Wizard
In sections 10 and 11, Yoast SEO will try to get you to:
- Sign up for the Yoast SEO newsletter
- Purchase Yoast SEO Premium
You do not need to do either of these things.
Just keep hitting next until you get to section 12 – Success! And then click Close:

Congratulations – you just configured Yoast SEO!
Using The Yoast SEO Meta Box
On a day-to-day basis, the Yoast SEO meta box is where you’ll interact with the plugin the most. The meta box helps you by:
- Analyzing your content for its SEO quality and readability
- Letting you configure settings for how your content functions in Google and social media
The meta box appears underneath the WordPress editor (its exact location depends on your other plugins and themes). There are two different ways to interact with the meta box:
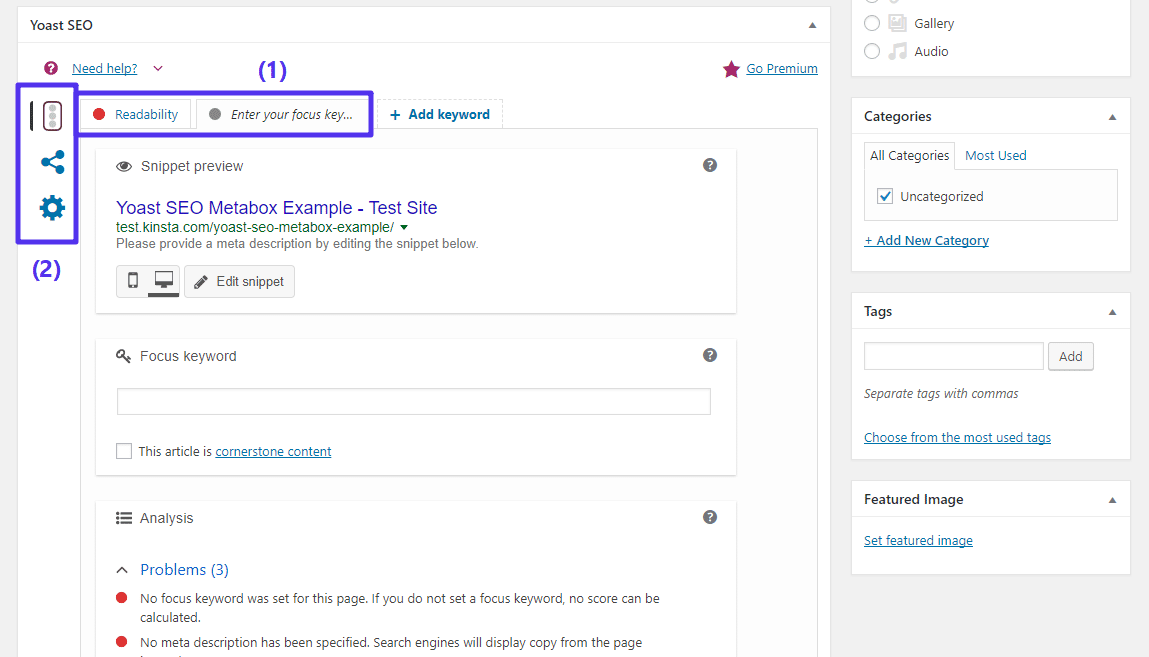
- (1) – lets you switch between SEO Analysis and Readability
- (2) – lets you access additional settings for social media and advanced options
Yoast SEO Analysis Tab
In the SEO Analysis area, you can enter a Focus keyword to optimize your content for.
Essentially, you’ll want to perform some basic keyword research to find a keyword that people are searching for. Then, you plug that keyword into this box and Yoast SEO will analyze your content to see how well optimized your post is for that specific keyword.
It will tell you both what you’re doing well and what needs to be improved:
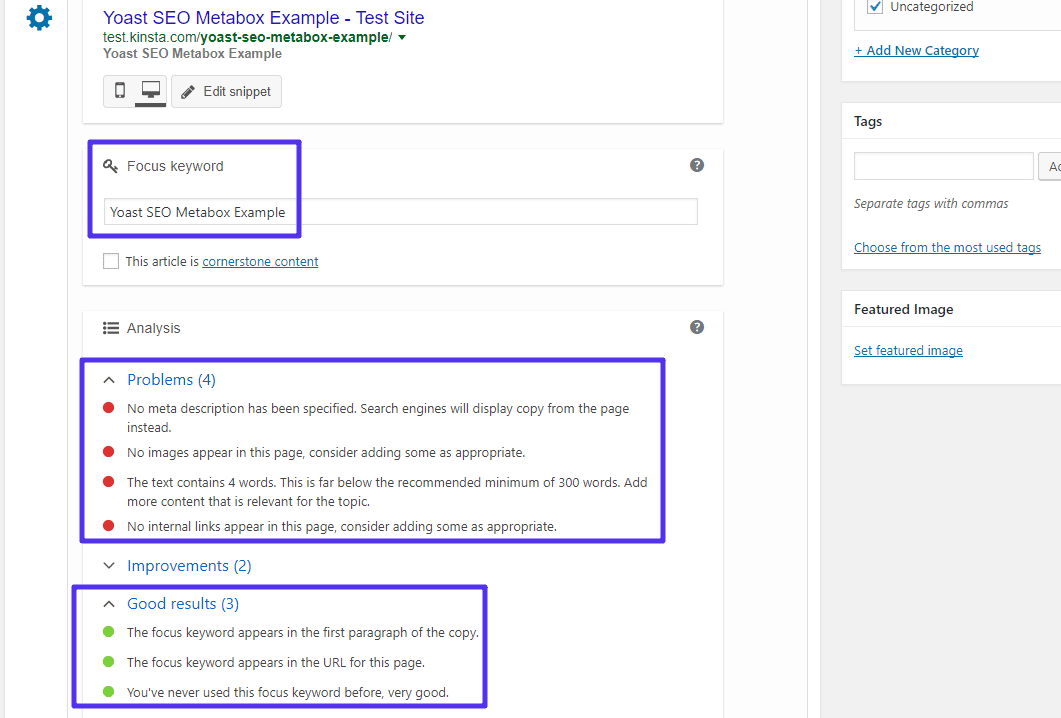
The Yoast SEO Analysis area
Beyond the analysis, you can also click the Edit snippet button to manually edit your content’s SEO Title and Meta description. You’ll see a live preview at the top as you edit the information:
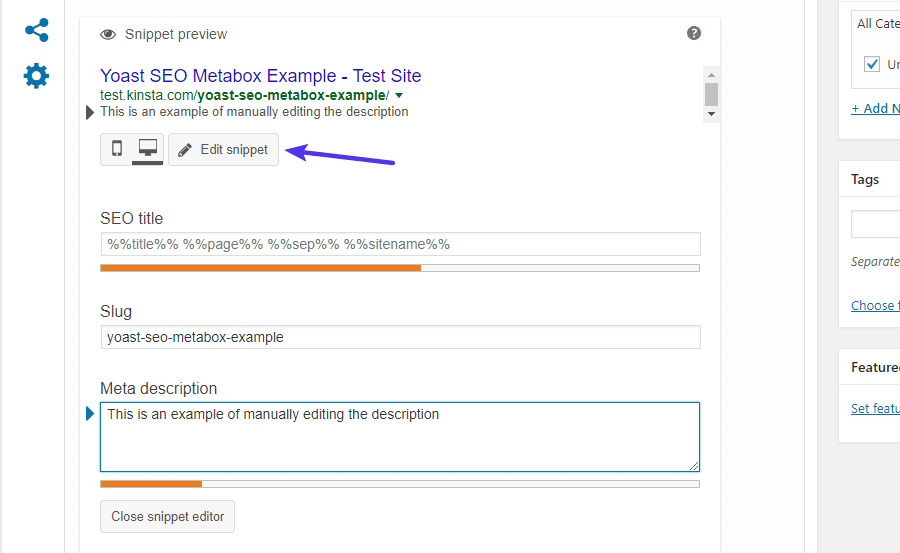
How to manually edit SEO snippet
This information is important because it’s what will show up in Google’s organic search results:

An example of a real SEO snippet
Yoast SEO Readability Tab
The SEO Analysis tab is mostly about how well optimized your content is for search engines. In the Readability tab, Yoast SEO tries to apply that same concept to humans. Essentially, it tries to gauge how readable your content will be to human visitors and then makes some suggestions for how to improve your content’s readability.
These suggestions aren’t perfect – so don’t feel like you need to get a perfect score. But they are a good high-level guide:
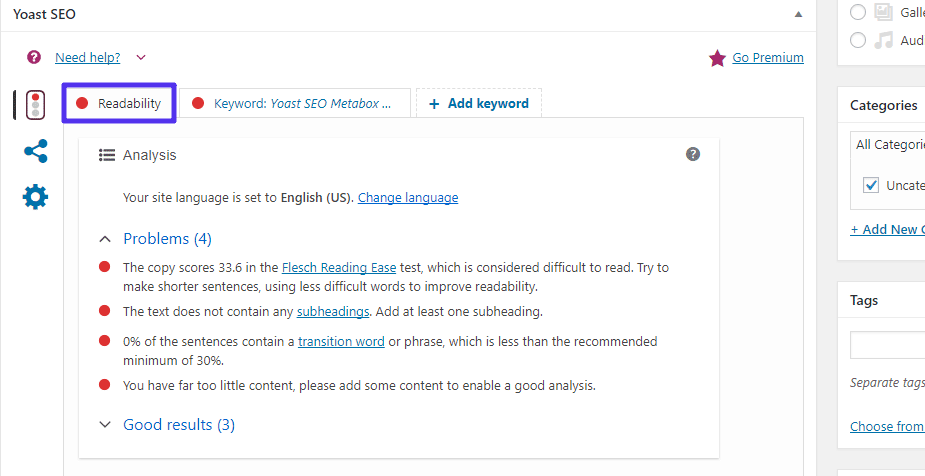
Yoast SEO readability analysis
Yoast SEO Social Media Tab
In the Social tab, you can manually configure how your content will look when shared on Facebook or Twitter:
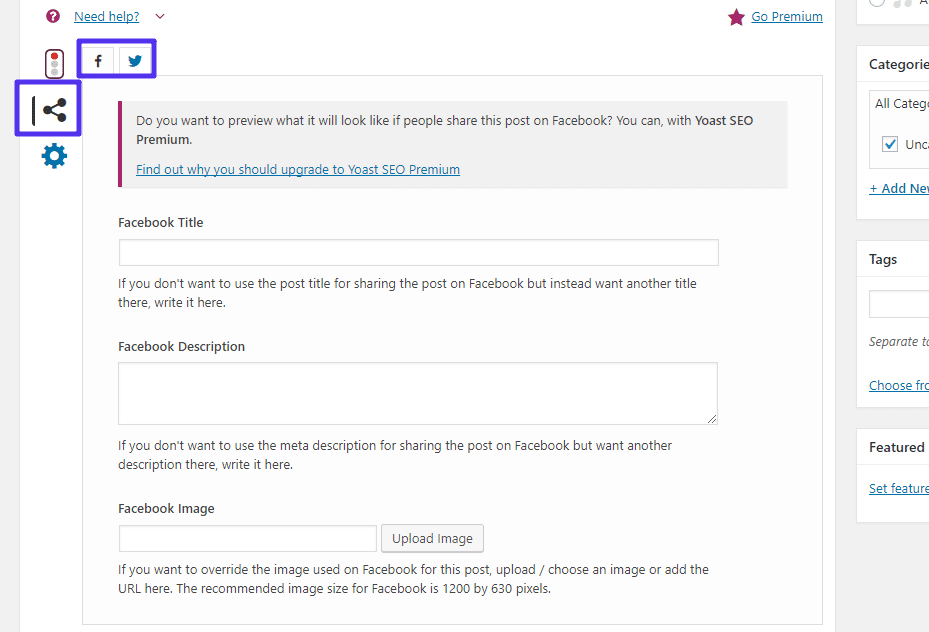
Yoast SEO social media settings for individual pieces of content
This is the information that a social network automatically generates when a URL is shared:

An example of how those social media settings affect things
Most of the time, you don’t need to manually configure this information for each post because Yoast SEO will automatically generate it based on:
- Your SEO title
- Your content’s featured image
But if you want to override those defaults, this is where you do it.
Yoast SEO Advanced Tab
Most of the time, you won’t ever look at the Advanced tab. But if you want to:
- Stop Google from indexing this specific piece of content
- Specify a canonical URL to avoid duplicate content
Then this is where you can do it:
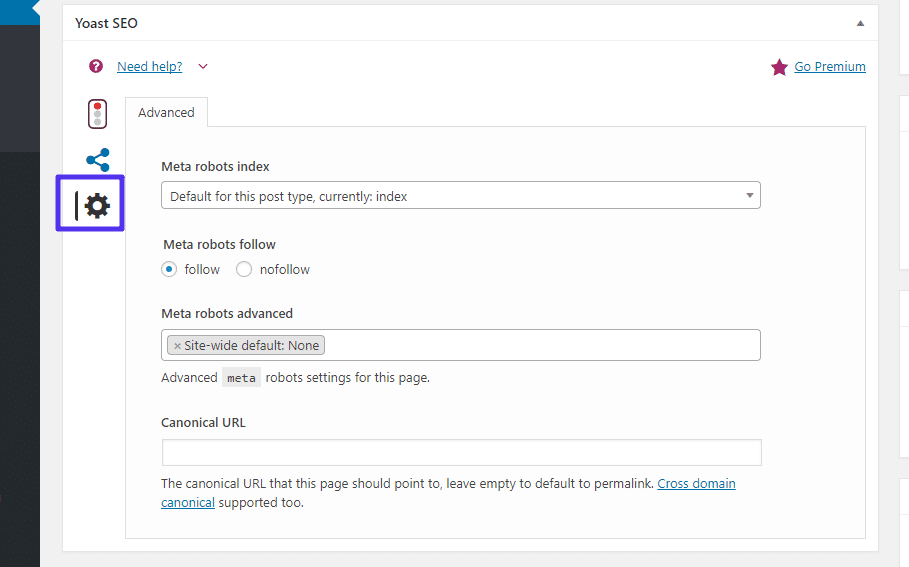
Yoast SEO meta box advanced settings
Exploring The Yoast SEO Dashboard
Now that you have Yoast SEO configured and understand the meta box, let’s take a look at the dashboard.
We grew our traffic 1,187% with WordPress. We’ll show you how.
Join 20,000+ others who get our weekly newsletter with insider WordPress tips!
We hate spam too, unsubscribe at any time.
On the main page of the dashboard, Yoast SEO will alert you to any potential SEO issues on your site.
For example, you can see that Yoast SEO doesn’t like the way that our test site’s tagline is still the default text:
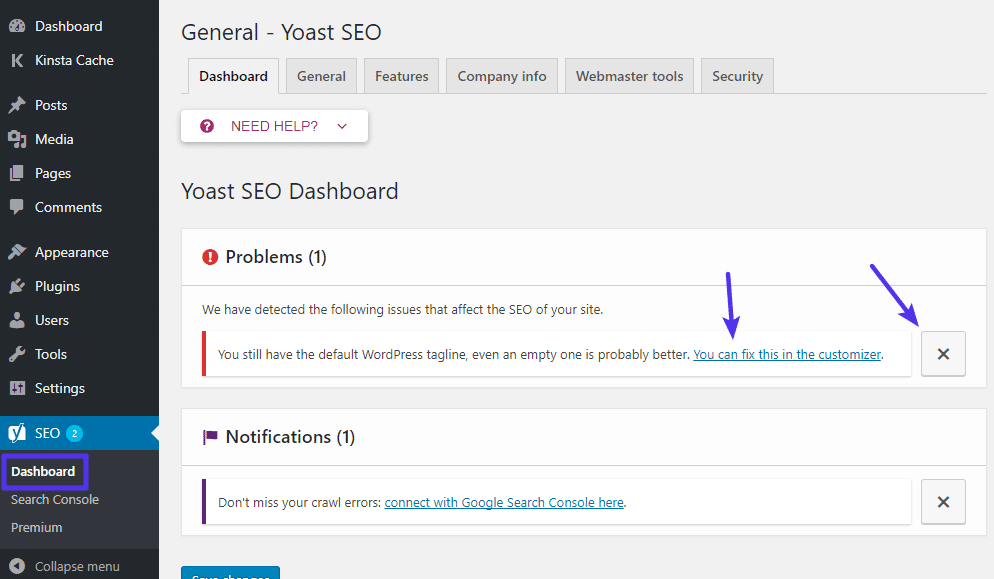
Yoast SEO dashboard notifications
Yoast will give you instructions for how to fix the issue. Or, you can always dismiss the notification if you don’t want to address it.
General Tab
The General tab isn’t very important, but it does let you:
- Access the configuration wizard
- Count the number of internal links in your post
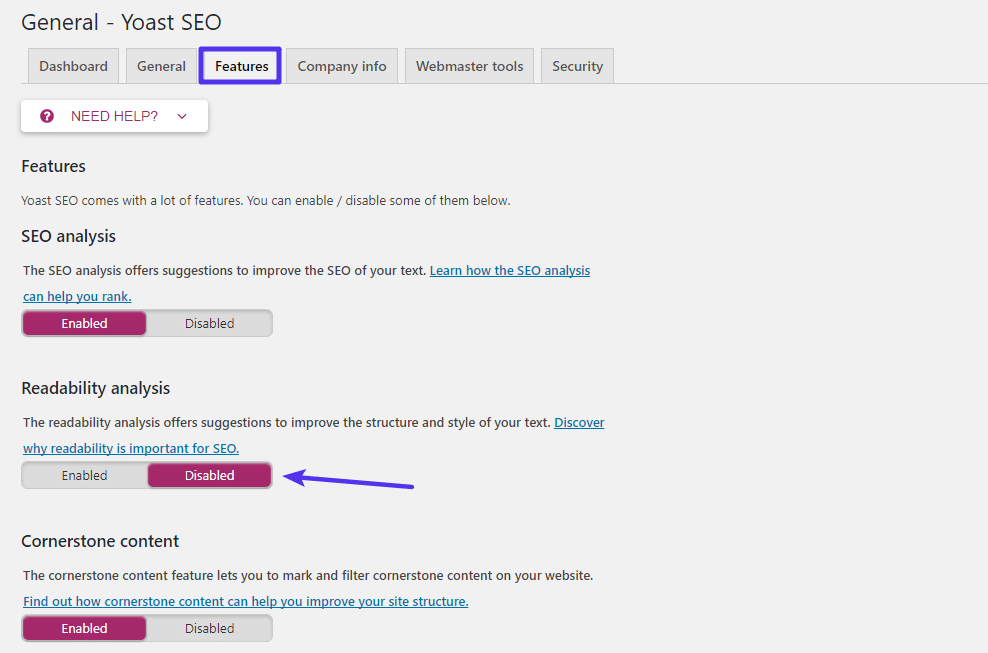
Features Tab
The Features tab is a bit juicer than the previous tab. In this area, you can enable or disable specific features of Yoast SEO.
For example, if you don’t find the Readability analysis in the Yoast SEO meta box, you can turn it off here:
Company info Tab
In the Company info tab, you can edit the company details that you set up during the configuration wizard:
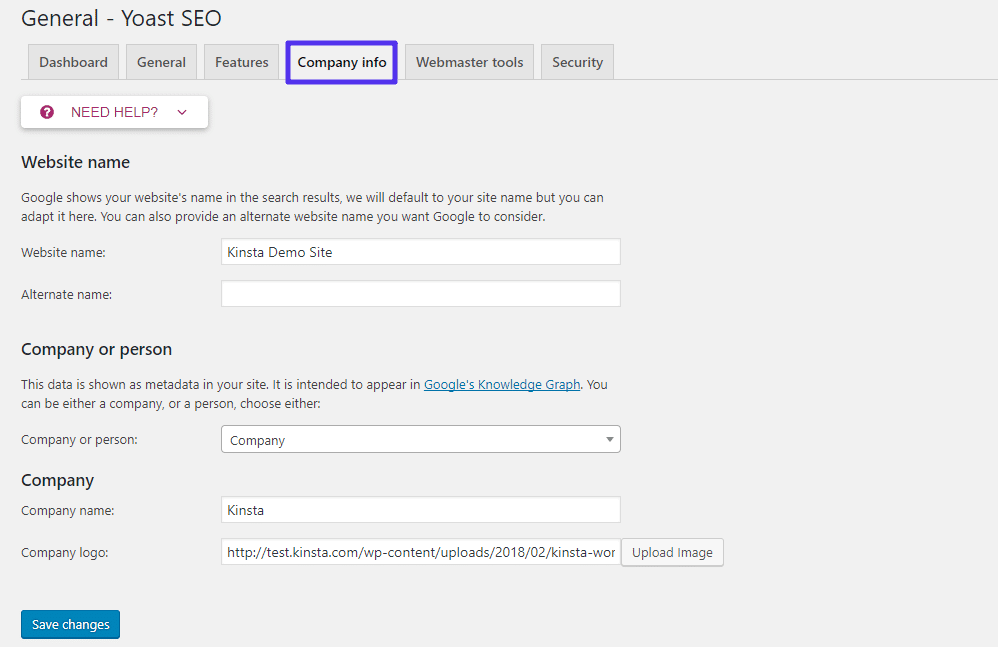
Yoast SEO company info tab
Webmaster tools Tab
In this tab, Yoast SEO can help you verify your site with various search engine’s webmaster tools:
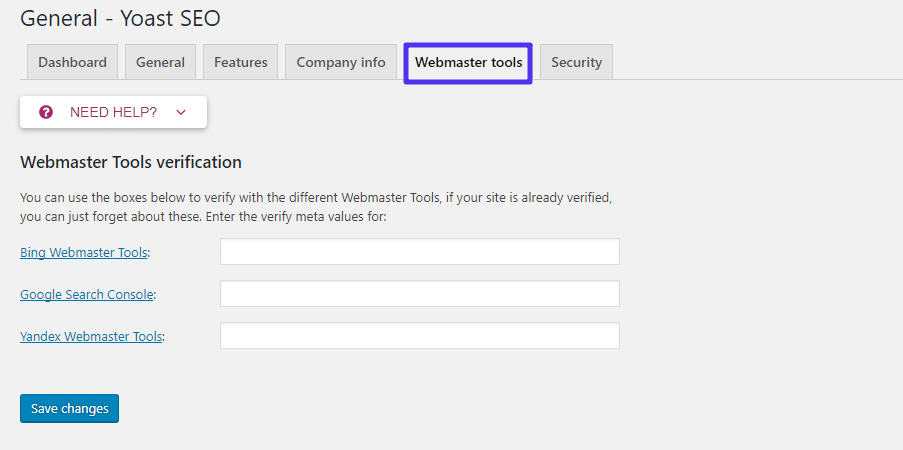
This area helps you connect to various search engine’s tools
Security Tab
In the Security tab, you can choose who has access to the Advanced area in the Yoast SEO meta box. By default, only Administrators have access:
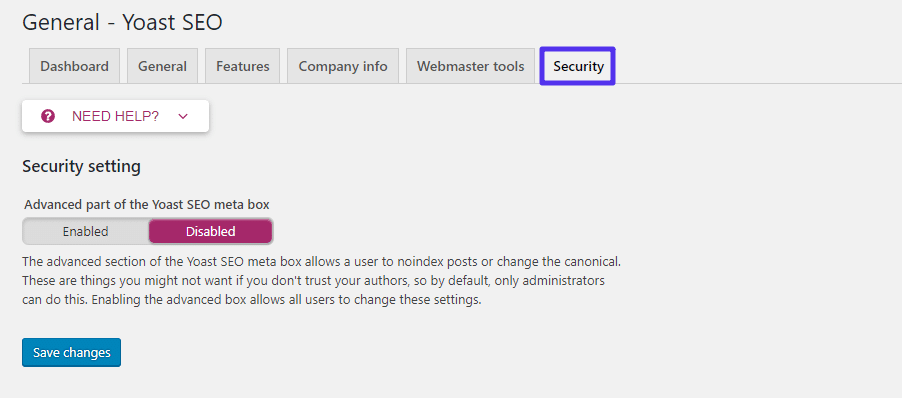
This lets you control who has access to the “Advanced” tab in the Yoast SEO meta box
Congrats! At this point, you should have a pretty solid understanding of how to use Yoast SEO’s core settings and features.
In this section, we’re going to dig into some of the advanced settings that Yoast SEO keeps hidden away.
How To Turn On Advanced Settings Pages
In order to access the advanced areas of Yoast SEO, you need to go to the Features tab in your Yoast SEO dashboard and enable the Advanced settings pages.
Once you do that, you should see a whole heap of new options in your WordPress dashboard sidebar:
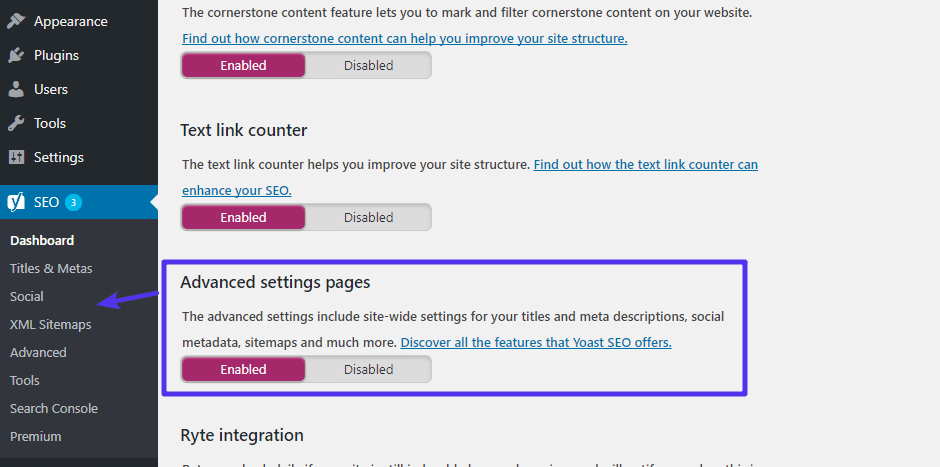
How to enable Yoast SEO advanced settings pages
Titles & Metas Options
The Titles & Metas area is an awesome tool for automating much of your on-page SEO.
Essentially, Yoast SEO lets you set templates for the SEO titles and meta descriptions for all of your:
- Posts
- Pages
- Custom post types
- Taxonomies
- Custom taxonomies
- Archive pages
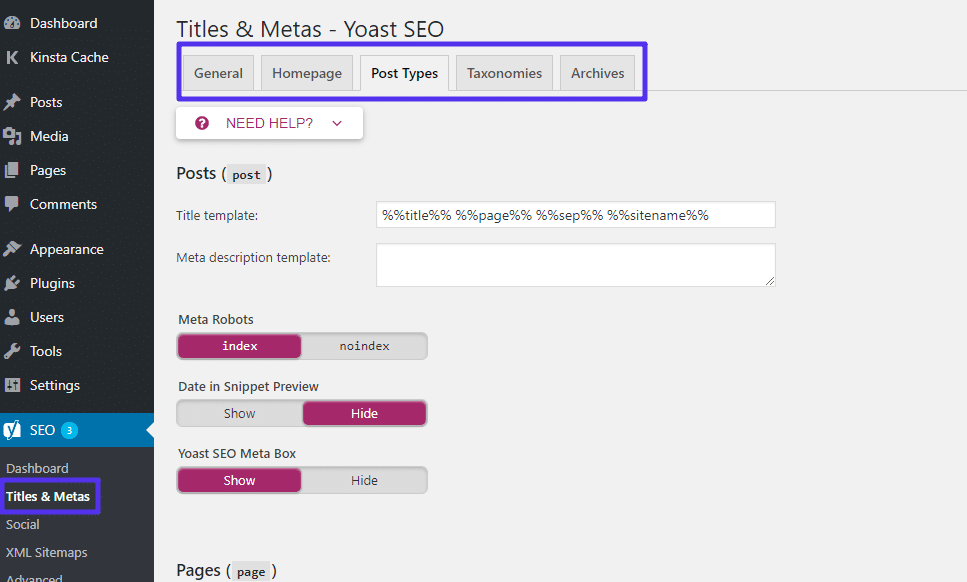
This are lets you control the templates for various types of content
What makes this so powerful is that you can use a wide range of variables to dynamically insert information including information contained in custom fields.
You can find a full list of these variables by clicking the Need Help? Button and choosing the Template explanation tab:
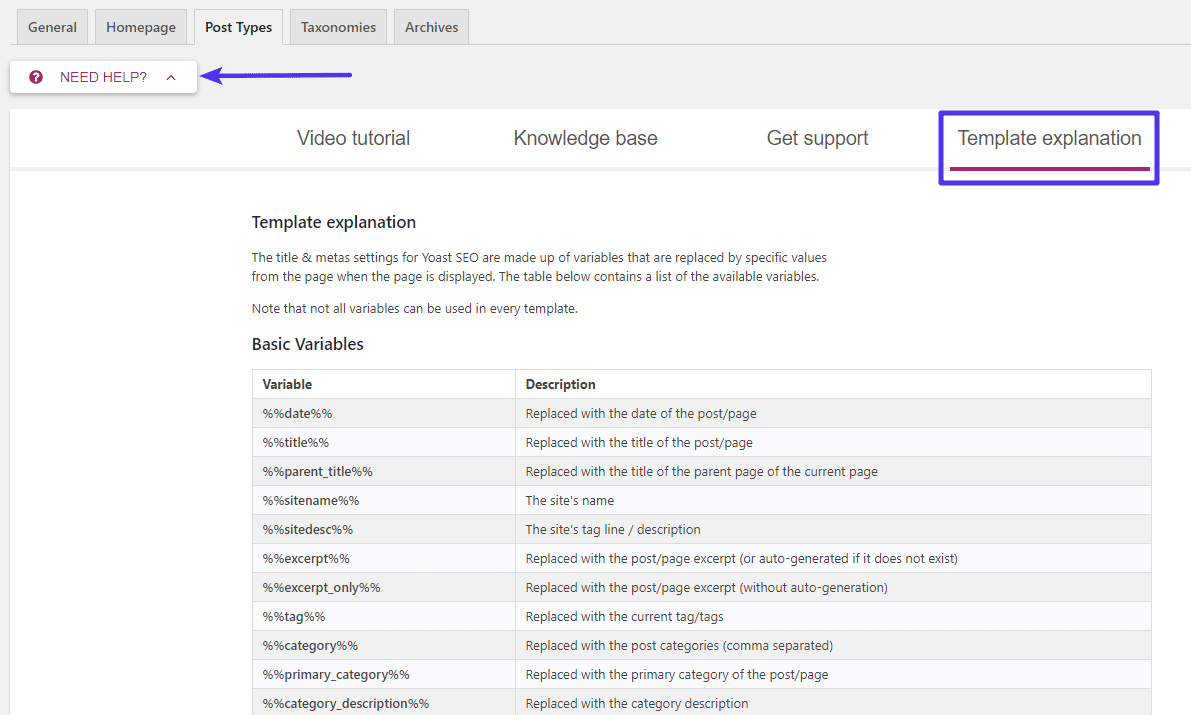
Some of the available template variables
If you scroll down to the Advanced variables section, you can find some really neat time-saving hacks.
For example, let’s say you run a coupon website and want to always make sure your post’s title looks like:
Rather than manually editing the title each month to keep it up to date, you could just use the %%currentmonth%% and %%currentyear%% variables to have Yoast SEO automatically do it for you.
Other things that you can do in this area include:
- Control noindex tags for specific types of content. If you make something noindex, Google won’t index that type of content in the search results. This is powerful so use it carefully. Only change the default settings if you know what you’re doing and the implications.
- Control whether or not the Yoast SEO meta box should appear for specific types of content.
Social Options
In the Social area, you can configure more general settings for how your site interacts with various social networks.
Most of the time, you’ll want to leave these as the defaults, though:
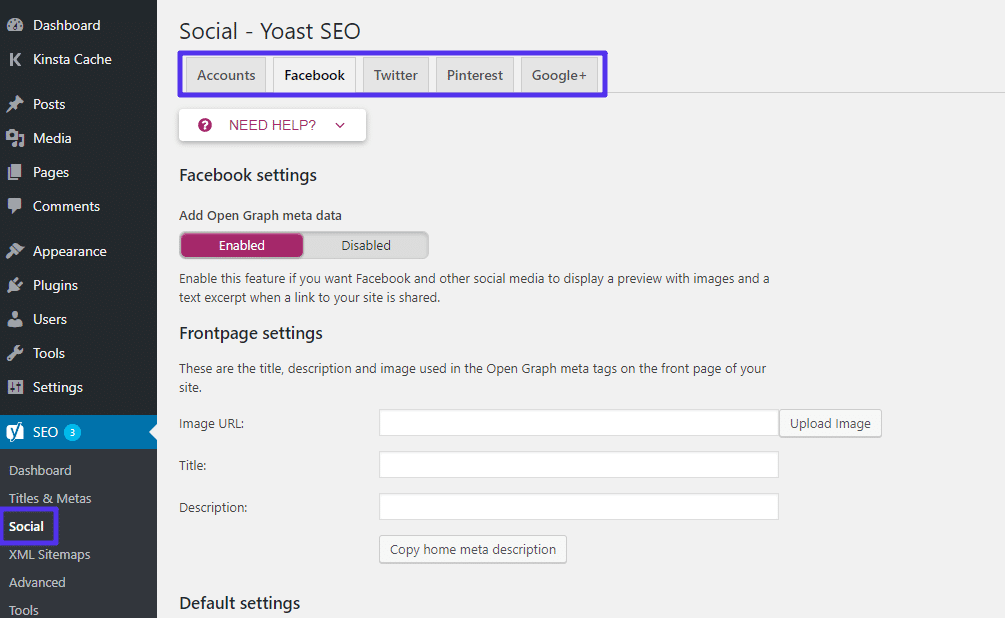
Yoast SEO advanced social media settings
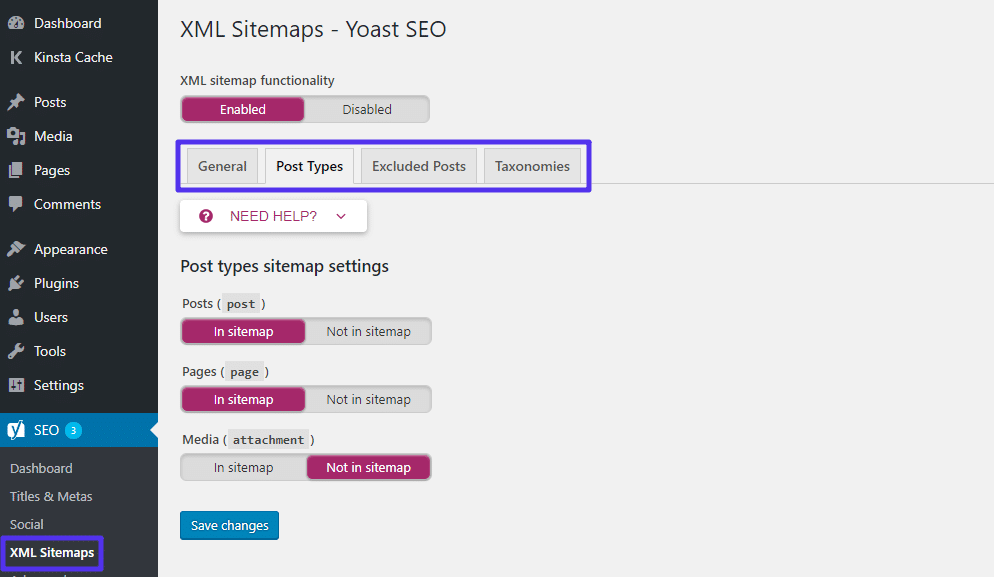
XML Sitemaps Options
In the XML Sitemaps area, you can:
- Choose to enable or disable this feature
- Manually include/exclude certain content from your sitemap
In the Post Types and Taxonomies tabs, you can choose whether or not to include entire types of content:
How to manage the XML sitemap that Yoast generates
And in the Excluded Posts tabs, you can manually exclude specific pieces of content by their post IDs
Advanced Options
The Advanced area covers three different features:
- Breadcrumbs
- Permalinks
- RSS
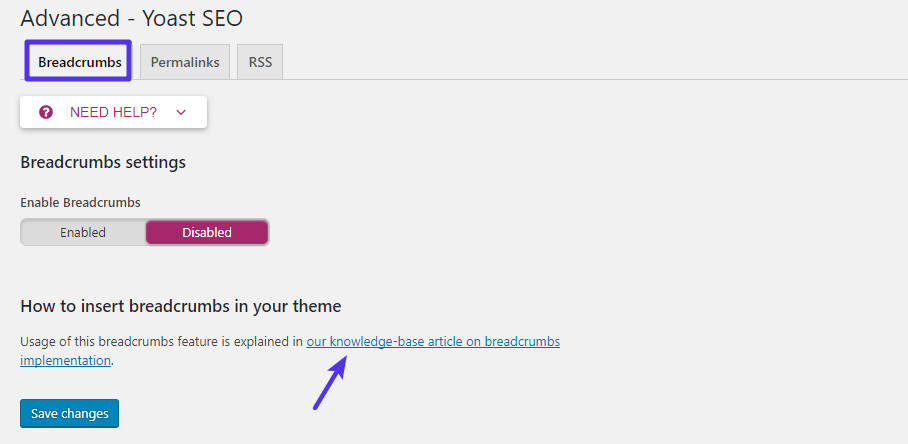
Breadcrumbs Tab
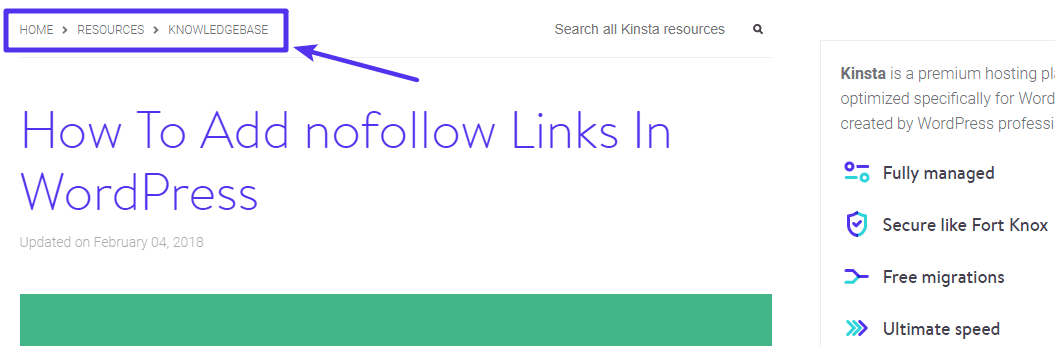
Breadcrumbs are a navigational feature that look something like this:
In this section, you can enable them via Yoast SEO. But, you’ll also need to add a small code snippet to your theme in order to get the breadcrumb feature working:
How to add breadcrumbs using Yoast SEO
Permalinks Tab
One of the most useful features is the option to remove the category slug from your URLs:
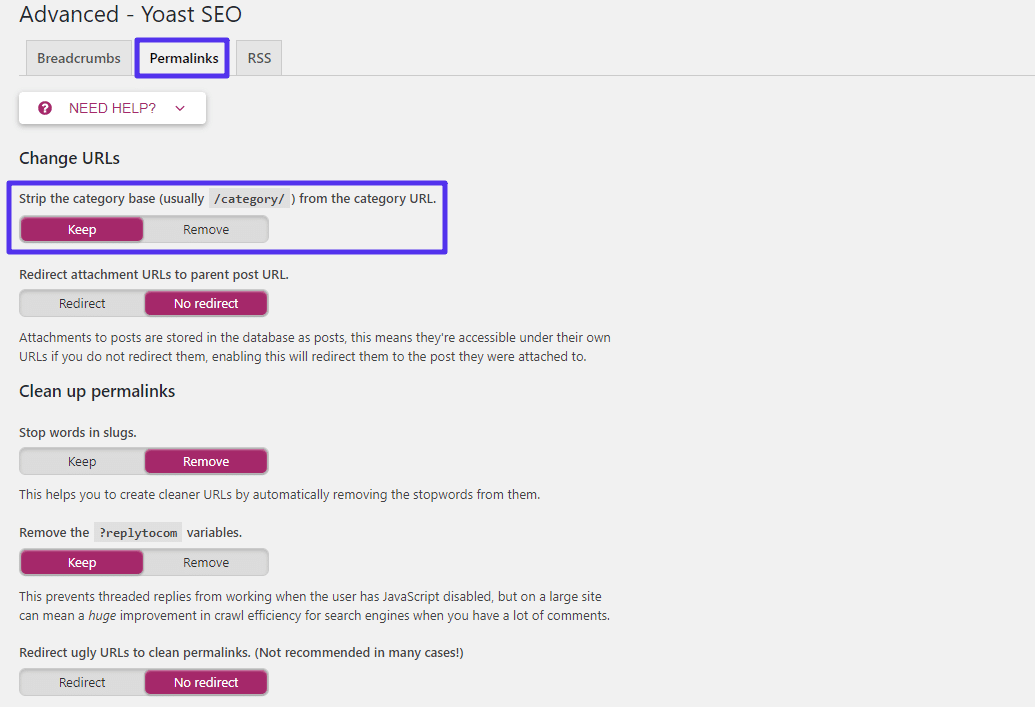
Yoast SEO advanced permalinks settings
- Have Yoast automatically remove stop words from automatically generated permalinks
- Set up certain types of redirects
RSS Tab
Finally, the RSS tab lets you insert extra content before or after your post content in your RSS feed. You can also use some variables to dynamically insert information, like a link to your blog to ensure proper citation:
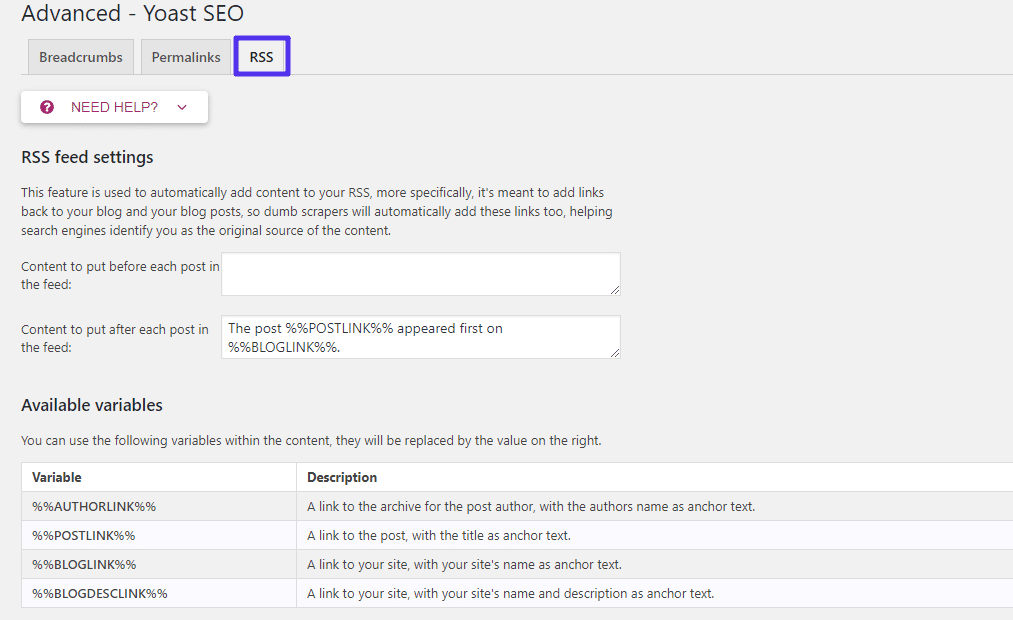
This lets you add content before or after posts in your RSS feed
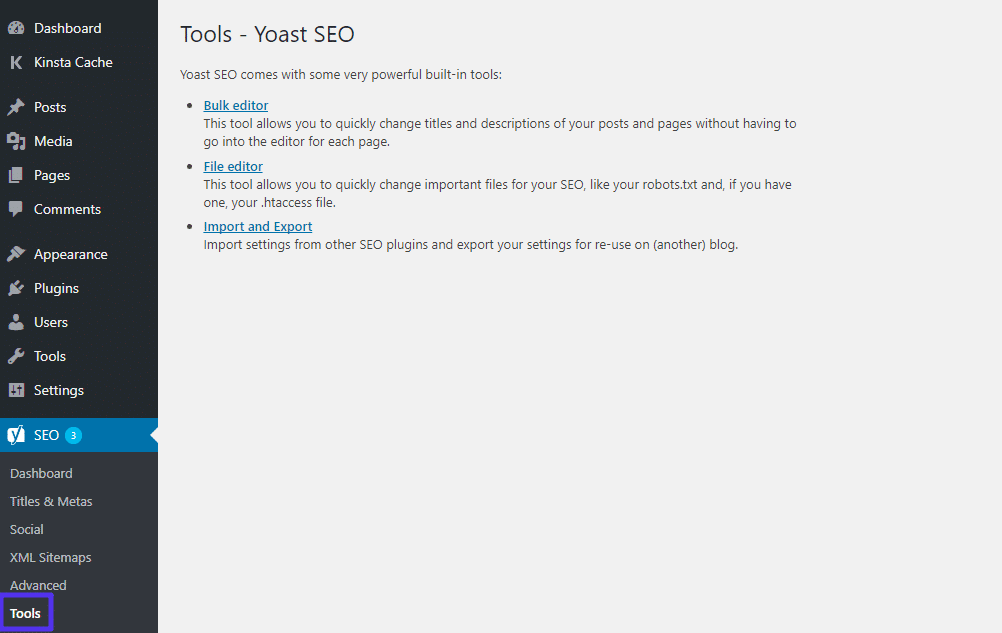
Tools Options
Finally, the Tools area lets you access various types of editors, as well as an option to import or export your Yoast SEO settings:
A list of the Yoast SEO Tools
If you click on the File editor option, Yoast SEO will help you create a robots.txt file (if you haven’t already). And once you have the file, Yoast SEO will let you edit it right there in your dashboard:
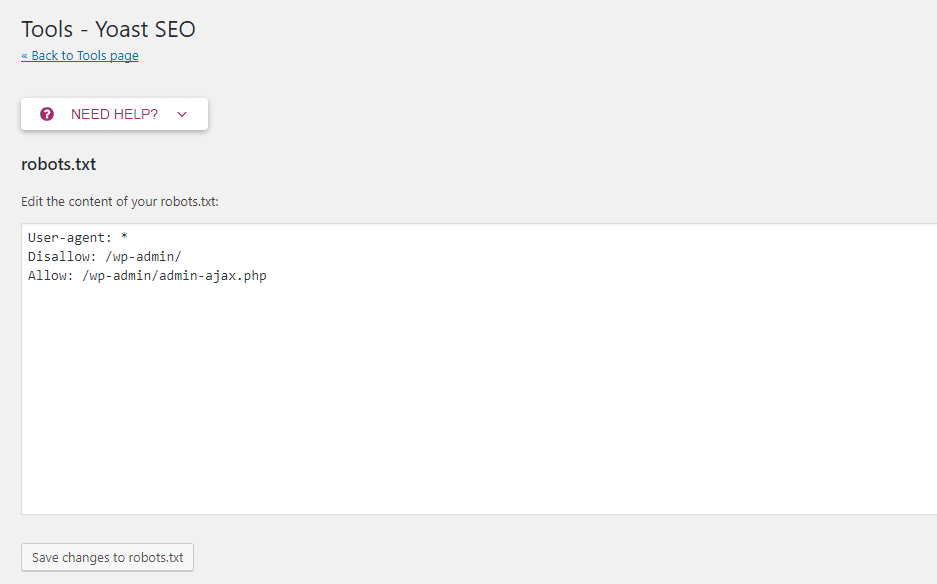
Yoast SEO lets you edit your robots.txt file from your dashboard
How To Use Yoast SEO In Your Everyday Website Life
As we hit the end of this guide, let’s round up with a look at how you’ll actually use Yoast SEO in your everyday WordPress life.
Most of Yoast SEO’s options are “set it and forget”. Once you get everything configured, the only area that you’ll use on an everyday basis is the Yoast SEO meta box.
For every post, you should, at a minimum:
- Enter a focus keyword. You don’t need to address every single suggestion from Yoast SEO, but trying to get a green light is usually a good goal.
- Configure the SEO Title and Meta Description. Even if you set up a good template, you’ll still want to manually edit these for most posts to make them as optimized as possible.
Other things that you might want to address include:
- Readability
- Social settings, especially if you think a specific piece of content has a chance of doing well on social media
Any other questions about how to use Yoast SEO? Leave a comment and let’s get your site ranking!
This content was originally published here.